Light Painting Photography
Links
- http://digital-photography-school.com/light-painting-part-one-the-photography/
- https://en.wikipedia.org/wiki/Light_painting
- http://lightpaintingphotography.com/
Goals / objectives:
1. Create unique fun pictures
2. Develop an understanding of how light and photography works
Materials Needed:
Camera. A DSLR Camera will work best but any camera that allows you to adjust the shutter speed will work such as a compact Digital Camera, a tripod or flat surface, a torch (flash light) or other light source, if students are responsible enough sparklers or laser pens can work well, a darkened room, or where applicable an unlit outdoor area at night.
Preparation:
Set up a darkened room or if possible outdoor location at night. In the room place the camera on a tripod or flat surface and point it at a stage or area where pupils will draw.
How long your exposure time needs to be depends on how complicated your design is and how long it will take. 45 seconds might be a good starting point but it really depends on you. With some cameras you can set the length of time to Bulb which means the shutter will stay open for as long as you hold the Shutter release this will give you the most flexibility. Your ISO should be around 400 and your aperture fairly high, obviously you’ll need to experiment with this and adjust it depending on how dark your room is and how much of the background you wish to be visible. When framing the picture it’s important to make sure there is as little light as possible, all light will be exaggerated in the image, any lamps or lights in the background will become very bright and large often taking over the whole picture. Choose a location that is dark as possible and position the camera so any lights that you cannot turn off are not in the frame. Make the frame as large as possible; you cannot always judge where your drawing will go, you can always crop the image later. To get an idea of what will appear in the picture you may wish to try taking a photo with the flash as a test before hand.
Explanation: Things to Consider
How the longer the camera lens is open the more light will enter the camera and the brighter that light will appear. Yet the more blurred the image will be.
Images can also be created by pointing the camera at a wall and writing or drawing on it with a laser pointer.
For best results students should draw the images slowly and large as this will produce clearer effects.
Painting with Light Video
|
|
|
|

|
|
|
Created with a sparker, The word was spelled out slowly and largely.
|
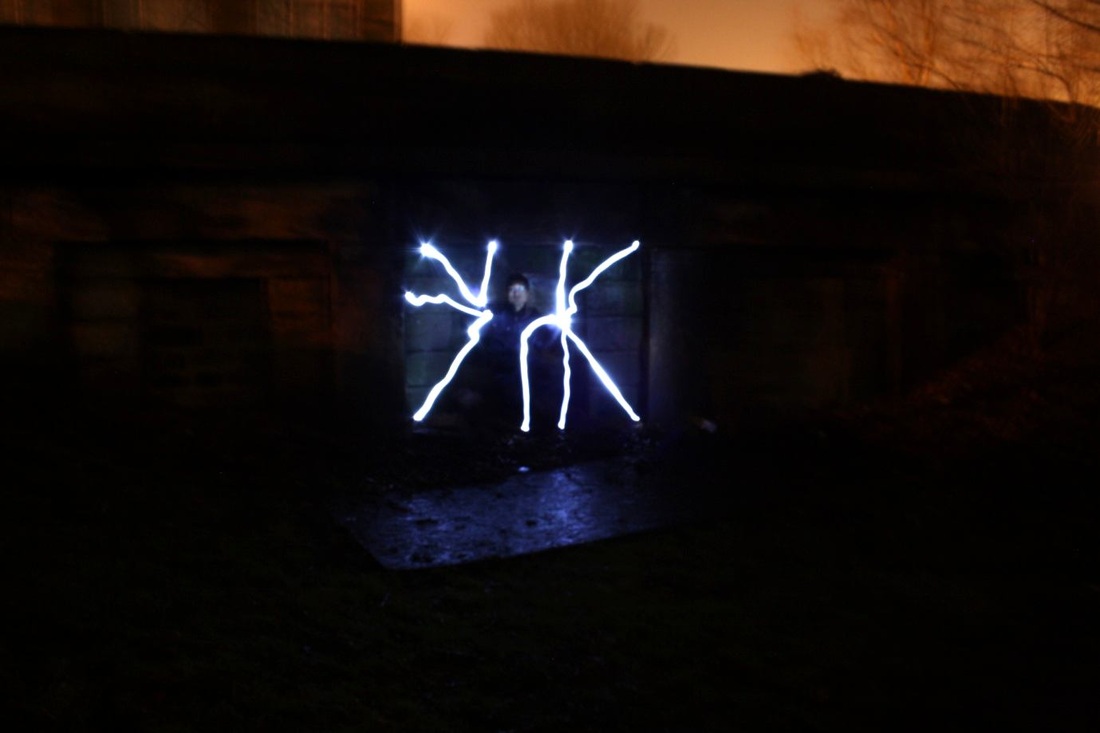
The flash light was first shined at the model, from a fairly close distance. The model was effectively coloured in. Then the flash light was turned towards the camera and “lighting bolts” were drawn coming from the models fingers. Remember to turn the flash light off when you finish each line, and then turn it on again when you’re ready to draw the next line.
|


